*As an Amazon Associate I earn from qualifying purchases.
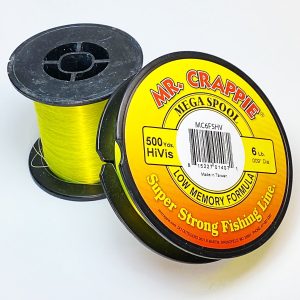
To assemble a slip float rig for crappie, you’ll need (1) a bobber stop, (2) a float, (3) a hook or jig to attach to the end of your line, and perhaps a clip on (4) lead sinker. The jig or bait should be heavy enough to make the float sit vertically in the water. My preferred setup is a 1/16 oz. Sized Thill Crappie Cork![]() , a 1/16oz crappie jig, and a bobber stop knot with no bead.
, a 1/16oz crappie jig, and a bobber stop knot with no bead.
To tie the slip bobber rig, (1) slide your bobber stop onto the line, (2) followed by a small bead (optional), (3) then your float, and (4) tie a hook or jig to the end of your line. (5) Tighten down your bobber stop knot, and slide it to your desired depth. (6) If you’re not using a jig, add the appropriate amount of lead weight to cause the float to sit vertically.
There are other good setups discussed below, and precise steps to tie the slip rig are listed at the bottom.
Supplies Needed To Tie A Slip Bobber Rig
Below are all the supplies you need to tie a proper slip float rig for crappie. There are a few different alternatives, so I decided to break each of them down individually. Choose whichever combination of supplies best suits your preference, or matches what you already have on hand.
1. First, You Need A Bobber Or A Cork
When it comes to the float portion of the rig, you need a bobber that has a small hole through the middle of it, as opposed to the classic yellow and orange spring bobbers. Below are several common options that are used when crappie fishing.
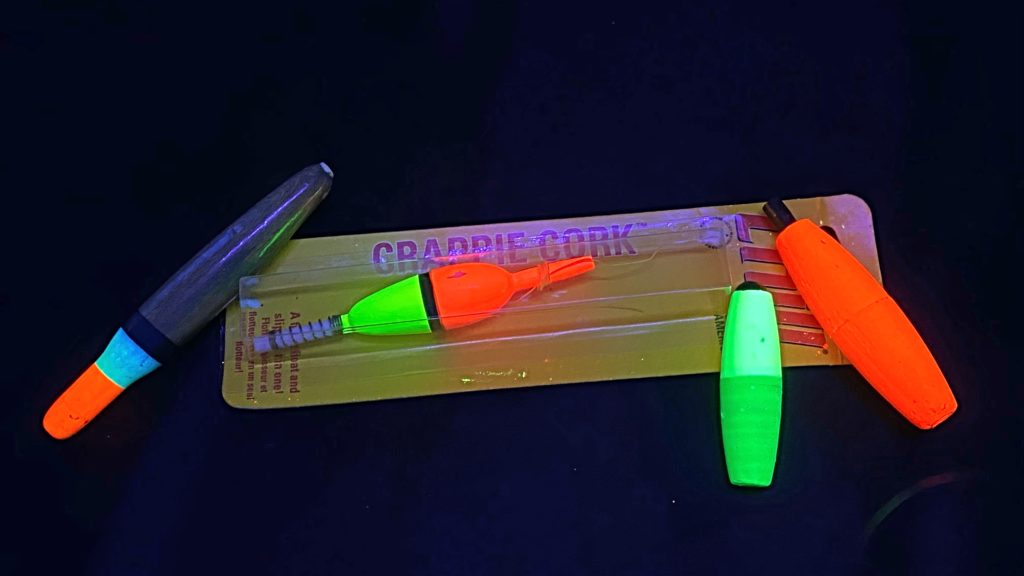
A “Sized” Thill Crappie Cork

* Click image above to view prices on Amazon
My favorite slip bobber is the Thill Crappie Cork in either 1/16 or 1/8 oz. size. The float comes with the slip knot already included and affixed to the top of the float, as shown above. The knot is ready to slip right off and onto your main line. Because the Thill has such a tiny hole through it, you don’t even need a bead with this style of float.
Balsa Floats
I also really like using balsa floats similar to the one pictured above and on the far left. With balsa, the buoyancy just seems to be ideal for the purpose of crappie fishing. From my experience they also tend to be very durable. I have used the same balsa floats over and over and over, while foam floats tend to become damaged with even the lightest use. It’s just personal preference really, so use what you like and can afford.
Classic Foam Floats
Depending on where you obtain them, a foam float can be just fine for this rig. However, I often run into a situation where the foam inside the float has a bit of foam particle interference that makes it quite difficult to get the line to feed through. For this reason, as well as their fragile nature, foam floats are my least favorite option.
When you run into a foam float that has an obstruction, you’ll need something long and straight to poke the hole free. That’s just too much of a pain for me to bother with, so I typically avoid this style of bobber.
Foam Floats With Plastic Tubes Down The Center
The small foam floats that have the tube running all the way through the middle of them are a decent option. With the plastic tube you don’t run into the issue of your line getting hung up inside when trying to run it through. However, these are not as durable as the Thill bobbers, so although they are cheaper, I don’t think they are as great of a value in the long run. I have and still use Thill bobbers that I purchased many years ago. I can’t say the same for foam bobbers.
2. Bobber Stop
Your “stop” is what allows your float to slide up your main line, but then “stop” at the proper depth that you desire. If you’re using a bobber stop in order to fish deeper depths, which I often do, you’ll be reeling that stopper up through your rod’s guides and onto the spool of your reel. For that reason, you want a setup that won’t hang on your guides and won’t get tangled in your reel’s spool. You also want it to pass cleanly through your rod’s guides on the cast.

* Click image above to view prices on Amazon
You have several options when it comes to “stopping” your bobber from riding up the line. The string bobber stops that come on a plastic tube, pictured above, are what I use 90% of the time. These are cheap and easy to use. Sometimes I’ll even use just the knot without a bead. There are a couple other alternatives below, which I don’t personally use.
There are 2, 3 or 4 hole plastic stops that work ok, but they can be more difficult to work with than the knot style shown above. These are tiny pieces of plastic with holes that you snake your line in and out of. This creates friction that holds the stopper in a particular position on your line. These are not my cup of tea, but I will say, if you can find the 4 hole style, those do work the best of this design.
You also have rubber egg shaped stoppers on the market that have an issue with getting hung in the spool of a reel. So, I steer away from those altogether.
You could also tie your own stopper knot around your main line. Basically, instead of sliding a string stopper onto your line, you use some monofilament to tie the same or similar knot around your main line. This works great, but it’s too much trouble for my own personal taste.
3. Crappie Jig, Or Hook & Weight
Use Properly Sized Crappie Jigs For Your Float
As discussed, a slip float should sit vertically in the water. When it comes to choosing the correct size jig to make that happen, you should work your way up from the bottom. Rather than choosing a jig to match your float, you should choose a float to match your jig.
The jig size and weight should be whatever the crappie prefer. Then, use a float that sit’s vertical when combined with that jig. You can use small split shot to adjust the weight under the float as needed. Ideally, you won’t have to use any split shot. This is why I really like the floats specifically sized to a particular jig weight, such as the 1/16 oz. Sized Thill Crappie Cork.
Hook And Sinker
When it comes to a hook and natural bait, simply use 1 or more split shot to make the bobber sit vertically. However, you usually want to use as light of a payload as possible for crappie, so steer clear of any really large floats. Those large floats take too much weight to pull them down properly.
For hooks, I really like the gold Mr. Crappie Cam Action hooks or the Tru-turn hooks. For sinkers, I prefer the removeable split shot design, so I can quickly adjust weight as necessary.
Steps To Tie A Slip Bobber Rig
Below are the steps on how to tie the slip bobber rig. For even more clarity in how to do so, check out my Youtube video linked at the bottom.

1. Slide A Bobber Stop Onto Your Line
First, run the “bobber stop” onto your main line and slide it up a couple feet, or about how deep you want to fish. Don’t worry, you’ll be able to adjust this later. The float stopper will be moveable on your line.
2. Tighten Down Bobber Stop Knot
If you used a knot style stop, you’ll need to slide it off the plastic sleeve and tighten it down, but not so tight that you can’t slide it.
3. Trim Off Excess String
If using a string knot, trim the tag ends to about 1/8″.
4. Slide A Small Bead Onto Your Line (Optional)
For most floats, you’ll need a bead in your setup. The bead should have a small hole that catches on the bobber stop. If you use a float with a very small hole, you might not need a bead.
5. Slide Float Onto Line
Slide the float on and verify that it stops once it hits the bobber stop.
6. Tie On Jig Or Hook
Use a loop knot to tie on your jig, or use a palomar or clinch knot to attach a hook. For more information on how to tie loop knots, check out my article about that here – https://anglerwithin.com/loop-knots-for-crappie-jigs/
7. Ensure Float Sits Vertically
Make any final adjustments to get the float to sit vertically in the water. The more vertical the float rests, the easier a crappie can pull it under without feeling the pressure from the bobber.
Conclusion
The slip bobber rig is one of the most deadly setups for crappie. It’s extremely versatile and easy to tie. No matter what depths crappie are holding, it’s hard to beat this setup, especially for beginning crappie anglers. I’ll be rigging one up this weekend for the coming pre-spawn action, and I think you should too!
Check out my video below on how to tie a couple different variations of this rig.
Good luck out there!
Augustus Clay