I’m honestly not sure where I first ran across the idea of a spear gaff for kayak fishing, so I don’t know who to give credit for this simple, but amazing device. I had known about them for years and just never bothered to actually make one, as I don’t typically do a lot of BTB (Beyond the Breakers) fishing. However, since I have plans to try my hand at BTB again, I wanted to have one of these on hand.
You can find many designs on the web on how to build a spear gaff, also known as a Hawaiian spear gaff or kage gaff. The design below is simply my own. One thing I did do different than many of the designs I saw, was to incorporated a portion of the handle as a matching wooden sheath. I use the sheath to safely cover the point when it’s not in use. I knew I didn’t want an uncased spear rolling around in the surf with me in case of a rollover.
With that said, let’s get to it. Below are the step by step instructions on how to make a spear gaff.
Enjoy!
Basic Steps
1. Assemble the necessary supplies
2. Cut the handle to your preferred length
3. Mark the center of the handle
4. Drill a hole in the handle
5. Permanently attach the spear tip
6. Sharpen the tip
Hawaiian Spear Gaff
Step 1 - Assemble The Supplies
Bare Necessities Needed For A Spear Gaff
Some Type of Handle
A Spear Point (i.e. A Threaded Rod) - Preferably Stainless
A way to drill a hole in the handle
You may or may not already have something on hand that will work in place of having to purchase the 3 items above.
Following are the items that I picked up at local big box stores to serve these purposes.
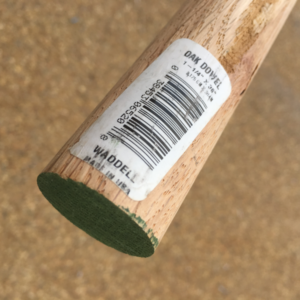
1.25" Diameter Oak Dowel 36" Long
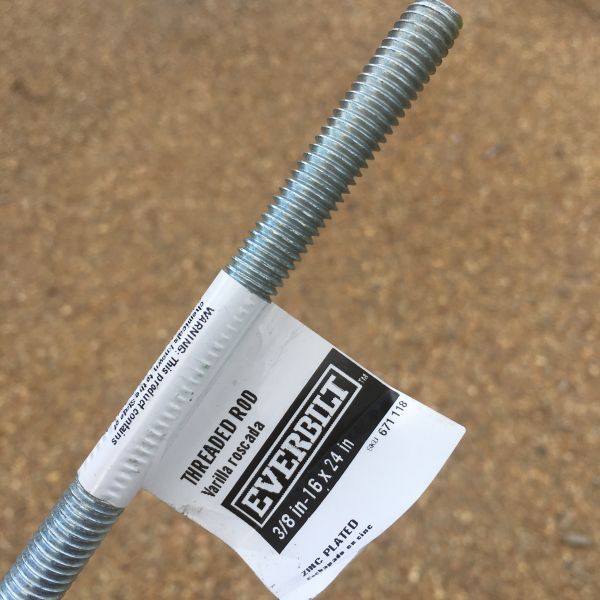
A 3/8" Threaded Rod
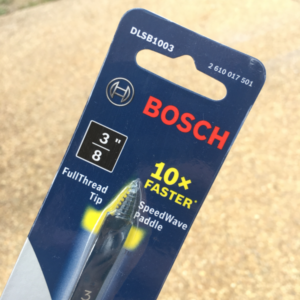
A long 3/8" paddle bit
I chose the oak dowel simply because it fit my hand the best. You could use a broom handle, shovel handle, axe handle or anything similar.
For the spear point, I chose a 3/8″ threaded rod. The hardware store didn’t have a 12″ rod available when I picked this one up or I may would have gone with that. The one below is 24″, which is too long and will require me to cut it to size. I have seen a 12″ and an 18″ threaded rod at various hardware stores since I purchased this one. Hindsight is always 20/20. Hopefully you can learn from my mistake. I recommend ordering a STAINLESS steel threaded rod online, for whatever size you prefer.
The paddle bit below is 16″ long. I wanted a long drill bit, because I wanted a hole deep enough to accept 5″ to 8″ of the threaded rod. The cheapest option I saw was the 3/8″ Bosch paddle bit pictured below. I think it was about $8. You could probably away with a normal length drill bit, if you already have one on hand.
36" Oak Dowel For The Handle
3/8" Threaded Rod For The Spear Point
Spade Bit
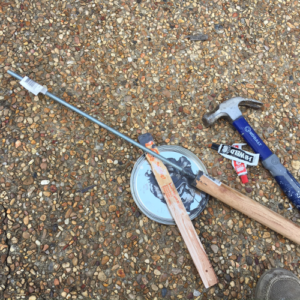
Some Other Tools And Supplies That I Used (I Already Had These On Hand)
When building your own spear gaff, it’s totally acceptable to modify your design around whatever supplies you already have on hand. I made some purchases simply because i had some idea of how I wanted it to be. But, honestly, you could use an old broom handle, a regular drill bit and some piece of scrap metal or long bolt as your spear tip. As long as your handle doesn’t break and your tip doesn’t fall out when you have a fish on the end, then that’s good enough.
With that said, here are the other supplies I used.
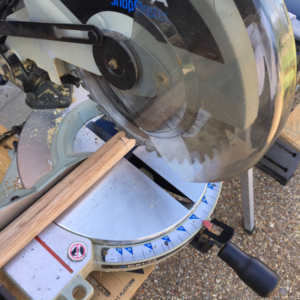
Compound Miter Saw - to cut my handle to size
Reciprocating Saw - to cut my threaded rod to size (a hack saw would have been fine but I took the lazy way out)
Cordless Drill
Standard 3/8" Drill Bit
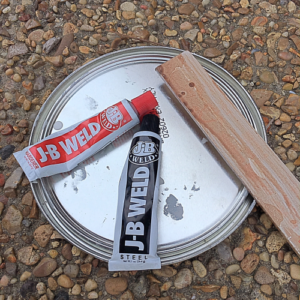
J.B. Weld 2 Part Epoxy
Boiled Linseed Oil
Compound Square
Step 2 - Cut Your Handle To Length (Optional)
Depending on your own personal taste, this step is optional. I decided to go with a 36″ oak dowel from Lowes, with the intention of cutting off 9″ to be used for a matching wooden sheath. The dowel is 1.25″ in diameter and it felt perfect in my hand. Other people have used shovel handles, broom handles and even 2×2 pine boards. You can use whatever you have on hand to save money, or you can do like me and find something at the hardware store that fits your hand well.
My spear point is going to stick out the end of my handle approximately 8″ which leaves me with an inch of solid wood on the end of my wooden sheath. So, to recap, I will have a 27″ handle with an 8″ spear point sticking out and a 9″ wooden sheath covering the spear point.
I made a mark 9″ from the end of the dowel and made the cut with my miter saw. You could use a hand saw for this step, but the miter saw helps you make a perfect 90 degree cut. This was preferred in my case, since I wanted the sheath to fit nice and flush to the handle.
If you chose not to have a sheath, you could just leave your handle 36″ long and avoid this step altogether.
Chopping The Handle To Size (27")
Step 3 - Mark The Center Of The Handle
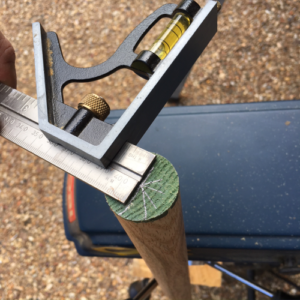
Since I was using a round dowel as my handle, this was very easy to do. I simply used a compound square to draw a few intersecting lines and marked the center with a nail.
Finding The Center Of The Handle
Step 4 - Drill A Straight Hole In The Center of The Handle
This step was a little trickier than I anticipated, as it is difficult to drill a perfectly straight hole using a hand drill. I had to use a hand drill since the handle was too long to place under my drill press.
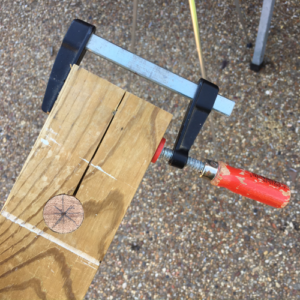
To help with this dilemma, I used a piece of scrap 2×4, along with a 1.25″ paddle bit I had in my garage. I made a jig to help me clamp the dowel in a perpendicular fashion. I simply drilled a 1.25 inch hole into the board and cut a notch in it as shown on the bottom right. This allowed me to insert the dowel into the 2×4 and firmly clamp it down.
1.25" Paddle Bit I Had
Making A Jig to Help
Clamping The Handle To A Flat Surface
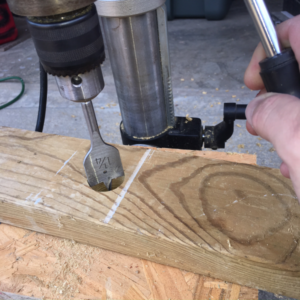
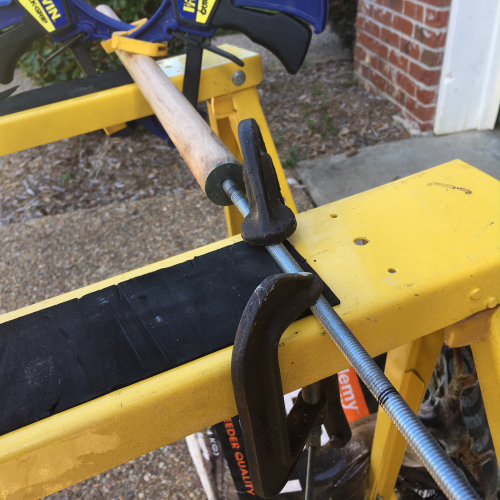
Now that I had a large flat surface to work with, I would be able to affix a homemade drill bit guide to it.
To build the guide, I simply chopped off a portion of the same 2×4 and drilled a straight 3/8″ hole into it using my drill press.
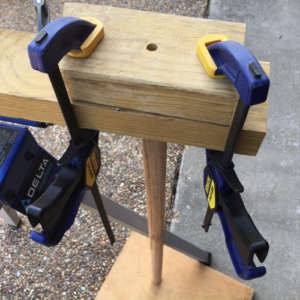
I carefully lined up my new guide with the marked center of the dowel rod. To do this, I walked out into the sunshine and looked into the hole while eyeballing the center. Finding center isn’t very hard to do with such a small hole. Once I had it where I wanted it, I clamped it all together and braced it to my miter stand (pictured below).
I have better, more stable, work areas but the lighting was good in the driveway and the weather was nice so I just made it work. Anything is possible with enough clamps!
I used the hole shown in the image below as the guide for my cordless drill. This enabled me to drill a perfectly straight hole into the dowel rod.
I first ran my regular 3/8″ bit down as far as it would go.
Clamping The Guide To The End Of The Handle
Drilling A Pilot Hole
The regular drill bit didn’t get me as deep as I wanted, so it’s time to step up to the long paddle bit.
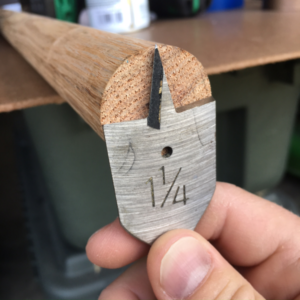
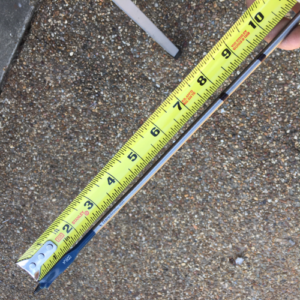
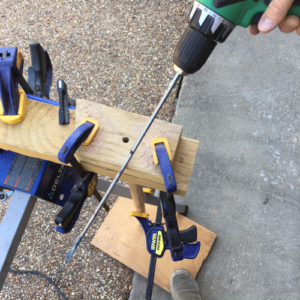
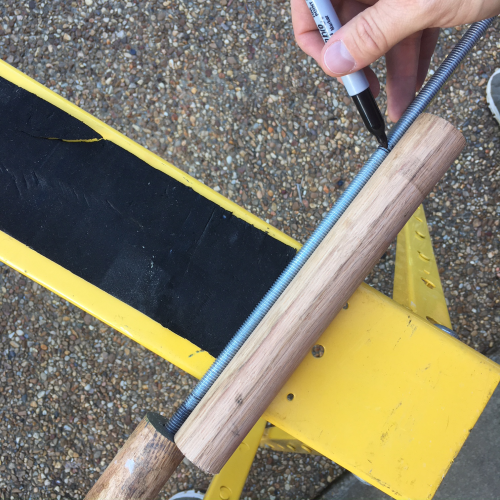
I used a black marker to make a 9.5″ mark on my paddle bit so as to indicate how deep I wanted to drill. This gives me an 8″ hole when you account for the 2×4 guide (1.5″). You see 2 marks on my paddle bit below because, at first, I didn’t add the thickness of my 2×4 into my calculation. But, I quickly corrected that and 9.5″ is the correct measurement. From here, all I had to do was to carefully drill out an 8″ hole using the guide shown below. I used the mark on my paddle bit to show me where to stop drilling. During this step, be sure to back the drill bit out of the hole often, in order to keep the hole clear of sawdust.
Measuring The Depth For My Threaded Rod
3/8"x16" Paddle Bit Ready To Go
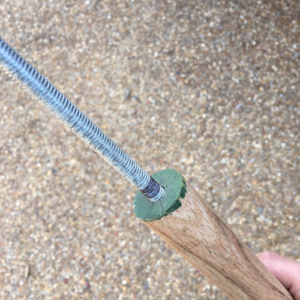
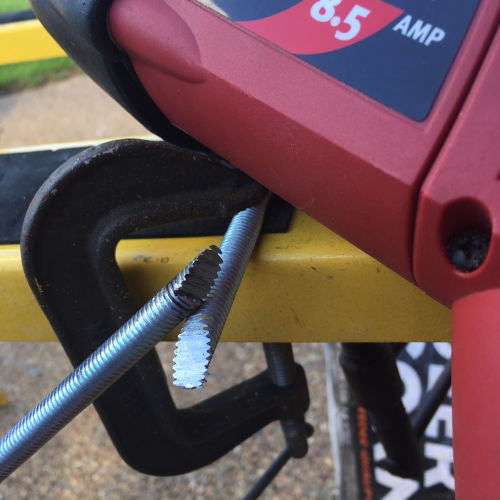
After drilling the hole, I did a quick test fit to make sure the threaded rod would slide in straight, and to the depth I expected. It was a tad short, as indicated by the black mark below, but that’s far enough.
The Birth Of A Spear Gaff
Note: After drilling the hole shown above, I followed this same process to drill out a similar (appx 8″) hole in the wooden sheath that I will use to cover my spear point. So, I’ll have 8″ of steel rod epoxied into the handle and another 8″ sticking out as the spear point.
Step 5 - Permanently Affix The Spear Tip To The Handle
Now that I had a proper fit, it was time to permanently affix the threaded rod into the handle. To do this, I used some J.B. Weld that I already had on hand. I mixed it up well, per the directions, and forced as much epoxy as I could into the hole using an old paint stirrer. Then, I began slowly inserting the threaded rod into the hole, while at the same time covering the threads with epoxy. Once the rod bottomed out, I tapped it with a hammer to be sure it was all the way in. Then, I wiped off as much of the excess epoxy that oozed out as possible. I let the JB Weld cure for a full day before proceeding.
JB Weld
Threaded Rod JB Welded In
Step 6 - Cut Your Spear Tip To Size (Optional Step)
After giving the JB Weld time to cure, I needed to cut my spear tip to size. You may not have to perform this step if you purchase a threaded rod the “right” size. But, since mine was 24″ I had to chop it off to make the tip approximately 8″.
Marking The Length Of The Spear Tip
Clamping The Spear Down
Cutting The Tip To Size
I took my wooden sheath (9″) and used it as a guide to make a mark for how long I wanted the spear tip to be (8″). Next, I clamped the spear securely to a couple sawhorses and used my reciprocating saw to cut the tip at an angle. You could use a hacksaw, angle grinder or dremel cut-off wheel. Use whatever you have available to make this cut.
Step 7 - Sharpen The Spear Gaff Tip
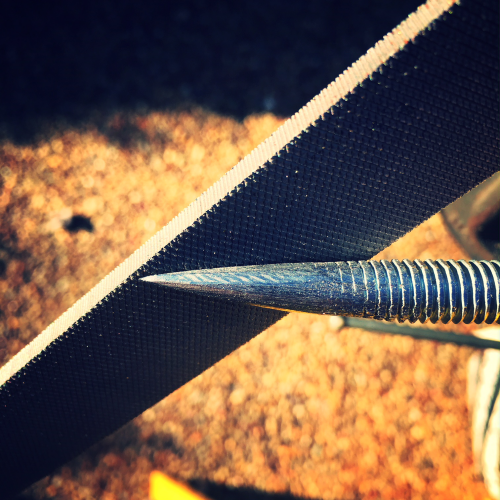
Now, our kage gaff needs a good sharp point. I started off using my Dremel tool with a grinding bit, but I quickly realized this wasn’t going as fast as expected. Since I don’t own an angle grinder, I decided to go old school with a bastard file, which actually made pretty quick work of the task.
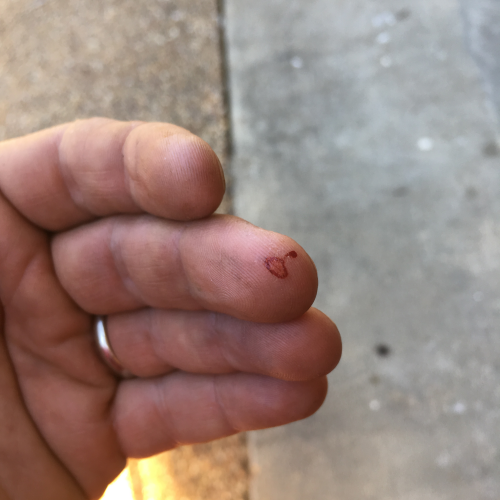
Even though I was very careful, I still managed to poke my finger with the tip. Be careful when sharpening your spear! Wear leather gloves if you have some.
Spear Tip Sharpened With A Bastard File
Spear Gaff Wound
Below are a couple pics of the near-finished product.
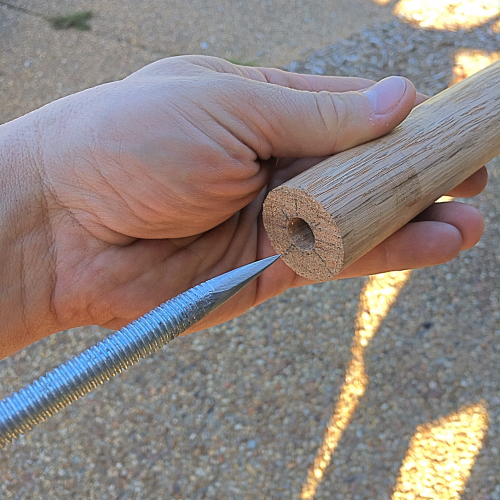
Kage Gaff Glamour Photo
My Spear's Matching Wooden Sheath
To finish things off, I lightly sanded the entire handle with a medium grit sandpaper, and then rubbed the handle and sheath down with boiled linseed oil that I had in the garage. Below is the finished product, for now. I may add some modifications later. More about this below.
Finished Product, MAYBE
Some Things I Will Do Different On My Next Build
I couldn’t find a stainless threaded rod locally, so that’s why I went with the zinc plated rod that I used. In hindsight, I wish I had exercised a little more patience, and ordered a stainless threaded rod online. I will do that next time.
I would also buy a shorter rod, so as to save a little money, and potentially avoid having to cut the rod to length. There was no point in buying a 24″ rod for this project.
Finally, if possible, I would try to find a 12″ drill bit instead of the 16″ inch paddle bit that I purchased. With such a long bit, you get a lot of vibration and wobble when you are trying to drill a straight hole. And, I only needed about 10″ of clearance anyway, so a 16″ bit was definitely overkill.
**QUICK TIP**
Although I have not tried it, you can probably get away with using a standard drill bit length rather than buying a long shank bit. That will save you about $8. However, if you do so, you will probably want to wrap the end of your spear with wire to strengthen the joint where the rod enters the handle. You may need that added strength, since your rod won’t be inserted very deep. More about that below.
Some Mods You Can Do To Your Spear Gaff
If the design above is too boring for you, there are plenty of mods that can be done to enhance the visual appearance and quality of your gaff. One common improvement I often see online is to add a wrap to the handle with 550 paracord. There are plenty of videos out there that will show you how to do that.
Another worthwhile upgrade is to add a lanyard to the end of the handle. This will help you hold on to the spear when stabbing at a fish. Just drill a small hole in the end of the handle and run a piece of paracord through, making a loop to go over your wrist. I will probably do this at some point.
Another good upgrade that will boost the quality of your gaff would be to wrap the first 1-2″ of the handle with some type of small wire and then epoxy or plasti-dip over the wire. This would add a lot of strength to the end of the spear where the point is inserted into the handle. That should help prevent any possible splitting of the handle when lifting a large fish. Since I have my spear point epoxied into the handle a good 7″ or 8″, I’m not too worried about that.
You can take your own spear gaff design as far as you like, as the possibilities are endless.
An Alternative
If building your own spear gaff seems like too much trouble, there is what appears to be a very nice option available on Amazon (link there from the image below).
Conclusion
If you plan to head out beyond the breakers, I think you’ll find that having a spear gaff aboard will provide you a little extra peace of mind.
When you bring that cobia of a lifetime along side your kayak, or maybe when an aggressive shark just won’t leave you alone, a Hawaiian spear gaff might be the piece of equipment you wish you had.
Good luck with your own spear gaff design and, as always, be careful out there!