*As an Amazon Associate I earn from qualifying purchases.
For most consistent bluegill fishing success, fish for them during the annual spawn. The spawn begins when the water temps approach 70 degrees in late spring. When the water temps start getting right, they make their way into the shallows and start aggressively feeding and attacking nest invaders.
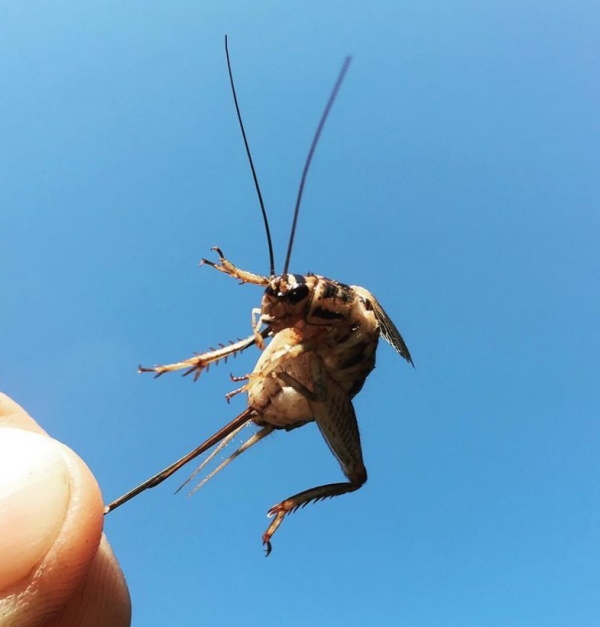
Although gills are aggressive biters, that doesn’t mean they like to chase their prey. A tried and true method is to slowly fish a live cricket or worm on a #6 hook suspended under a bobber. Add to that a very small pinch-on lead sinker to get the bait down to the fish.
In most lakes, spawning bluegill will typically be found in 2 to 6 foot of water, so set your bobber depth accordingly to keep your bait 8-12″ off the bottom.
Let’s dive into more details on how you can successfully target bluegills any time of the year, and what other tactics you can use to entice them.
About Bluegill
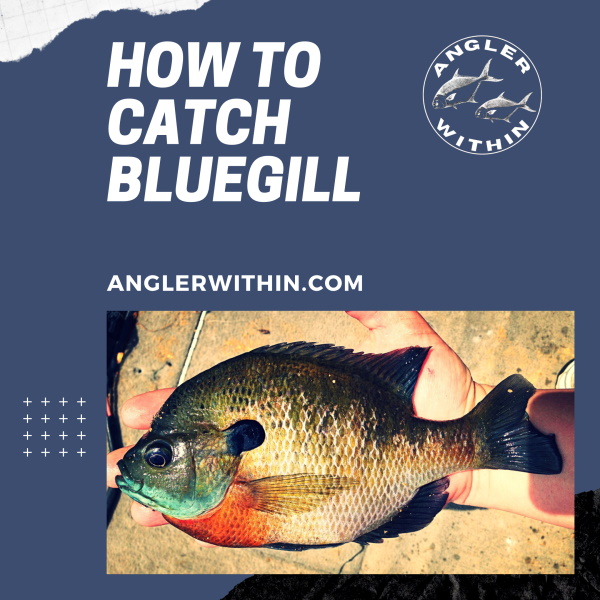
Bluegill are probably the most popular sunfish in America, and for good reasons. They are extremely wide ranging, and thus in reach of most anglers in the United States. They are also a hard fighting and tasty panfish that readily takes all sorts of baits. Many a angler got their start by wrangling with beautiful bluegills. It’s a fish that often ignites a fire inside young anglers that never goes out. I know they did that for me!
Larger bluegills can be over 8 years old, therefore it’s important to set some of them free. The bigger dominant males serve an important role in passing on their genetics as well as viciously defending the nests.
The record bluegill is 4 lbs. 12 oz. caught in 1950 in Alabama. You may think that sounds impossible, but that fish actually beat out a prior 4 lb. 10 oz. record caught in the same state. At least 4 other states have 4+ lb. records.
The Bluegill Spawn
Unlike redear, bluegill have an elongated spawn lasting throughout the warm months. The spawn begins in late spring or whenever the water temps start hitting near 70 degrees, and it can last for many months. Bluegills can spawn at least 5 times in a single year.
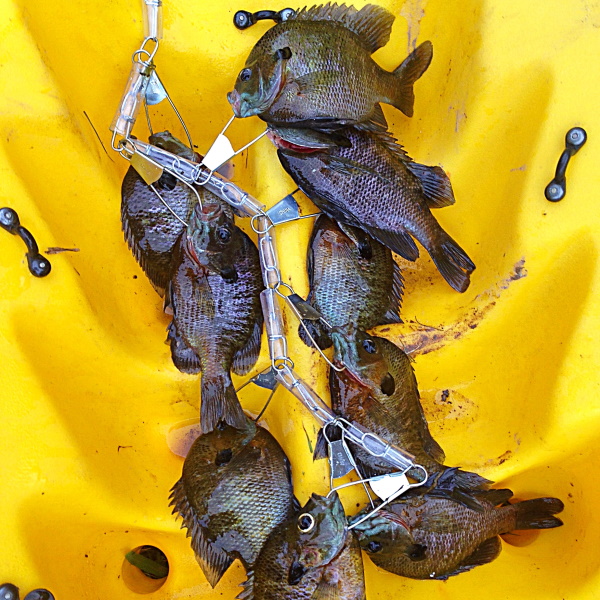
The spawn is the best time to pursue bream because they are not only actively feeding, but they will aggressively defend their nests from potential enemies (i.e. your bait). Much of the year the largest bluegill will stay in deeper water and leave the shallows to their younger brethren. The spawn is the exception, and is your best chance of the year at catching a bucket full of big boys.
You shouldn’t however simply expect that it’s easy pickings during the spawn. While spawning bluegill will generally be more aggressive, they can also be much more easily spooked, so stealth is key.
You should try to release some of the very largest dominant males. They are vital to the population in order to guard nests and pass on their genetics.
Best Locations For Bream
The most common places bluegill will be found are lakes, ponds and slow current or no current areas of river systems. Let’s briefly discuss each one of those.
Lakes
In large impoundments, bluegill will begin to spawn earlier in the shallower and muddier areas of the lake. These darker waters are the ones that heat up first.
My home lake has a large dam with a shallower upper river area. Bream begin bedding earlier in the shallower and muddier upper portion of the lake, whereas they bed later in the deeper and clearer waters near the dam. With this knowledge you can stretch out your spawn fishing success by relocating to where the most spawning activity is occurring at any given time. I do the same when crappie fishing to extend my opportunities with those as well.
Farm Ponds
Smaller bodies of water, such as ponds, will heat up earlier in the year than large lakes. Therefore, the spawn will kick off earlier on farm ponds. If you have access to a nice big pond, start your bluegill fishing there. You can always transition to lake or river fishing later in the summer.
Rivers & Creeks
When fishing rivers, try using a bobber setup in the pockets of the stillest water along the edge where there is little to no current. Any pockets or sloughs connected to the river are worth a try.
You can also fish slow current areas by going bobberless with just a splitshot above your bait. In any areas of gentle current, toss out your bobberless setup and let it sink down and flow with the current for the most natural presentation.
How To Find Bluegill
Bream will relate to different areas depending on the time of year you are pursuing them. Much of the year, you’ll find them in relatively shallow water hanging around vegetation, stumps and other cover. They will relate to structure where they can both hide from predators and hunt other prey that is also hiding there. Other times, they might school up in deeper water. Let’s take a look at the different timeframes you might be pursuing bluegill and how best to approach each one of them.
Fishing Bream Beds In Spring And Summer
When bream are spawning you’ll want to find their bedding areas. To do so, you should keep moving until you find active fish. Don’t waste too much time in an unproductive area. Ideal conditions will be those with hard bottom in relatively shallow water near some type of cover. If you can find that combination with proper water temps, you should find spawning bluegill.
Bluegill being to spawn when the water temps reach the mid to upper 60’s, however prime spawning temperature is perhaps closer to 75 degrees. This will typically be in the May/June timeframe in most areas.
Hard Bottom Spawning Areas
When it comes to spawning bluegill, you need to be thinking firm bottom. If at all possible find some type of hard bottom. Any hard bottom near some type of cover, such as lily pads or stumps, is an outstanding place to try.
It’s not absolutely required, but hard bottom will always be the preferred bedding area if it’s available in the right depths of 1.5 to 6 feet. Ideal bottoms will be made up of sand, rock, shells, and other dense substances.
Use your fish finder or simply use a stick to probe the water to find these hard bottom areas. You could also fish a bottom rig with a heavier splitshot to feel for hard areas.
Spawning Depths
Precise spawning depth will vary depending on various factors. In particular, the water clarity of a given body of water will impact how deep most of the beds are. Murkier waters will generally have shallower beds and clearer waters will generally have deeper beds. Beds can be found as deep as 10 feet or more in clear water. I’d say most of us will generally be searching for beds in water that is 7 feet or less.
In clear water, it may be fairly easy to spot the tell-tell mini craters along the bottom. In murkier water, you’ll have to rely on other tactics involving your eyes, ears and nose as discussed further below.
Secret Spots
Once you find good spawning areas by using the tips below, keep them close to the vest and commit them to memory. If there are no significant changes to a body of water, there is a great chance your new spots will continue to produce bedding action from year to year.
Use A Stealthy Approach
Bream are more wary when they’re on shallow beds, especially when those beds are absent of nearby cover. You’ll need to keep your boat a good distance away from the beds and don’t bang around too much.
If you can actually see the bedding area, you should attempt to pick fish off from the perimeter before making your way to the center of the action.
When a good spot slows down, let it rest for a short while. Oftentimes you can return to it later in the same day and pick back up on the action where you left off.
Ideal Spawning Haunts
I tend to find spawning bluegill around points, in shallow coves and really anywhere I can find a combination of hard bottom and cover in 1 to 6 foot of water. There should be little to no current hitting the spot.
The best bottom composition for beds on most bodies of water will typically be rock or sand. The presence of some type of cover is certainly not necessary, but nearby vegetation or wood is a great bonus.
Detect Bream With Your Eyes
During the spawn, you’ll often be able to spot bluegill nests along the bottom. Once you see them, you’re not likely to forget what they look like. They sort of look like miniature craters like you see on the surface of the moon. This is a fitting comparison, considering the full moon of May or June is often what triggers an all out spawning frenzy in many areas.
Use a good pair of polarized sunglasses to help your eyes pierce through the water to see these dark depressions.

In murkier waters, there are still ways to use your eyes to locate bedded bream. Oftentimes bedding bluegills will give away their presence by motion on the water’s surface or a flash in the water. You may even be able to detect an oily residue on the surface of the water when there are concentrations of bedding gills. Sometimes you can even spot foam or bubbles on the surface that will give away the beds.
Detect Bream With Your Ears
When there is a concentration of bream nearby, you can often hear the popping sounds they make when plucking insects from the water’s surface. On my home lake, we have a large number of lily pad fields. When bedding gills are feeding around and underneath the pads, you can clearly hear the pops they make when feeding.
You Can Smell Bream Beds With Your Nose
Another great way of locating spawning beds is to use your nose. Unfortunately I seem to have a poor sense of smell and thus often overlook the tell-tell odor of bluegill beds. I’ve smelled them at times, but with no consistency. Perhaps you and your better smeller will have better luck than I in sniffing out bream beds in early summer.
The most common description of the smell you’re looking for is of overripe watermelon. People also described it using a whole host of other words, such as cantaloupe, sweet, musky, oily, strawberry or musty.

An important thing to note is that the watermelon-type smell does not always seem to be present. I suppose there has to be quite a concentration of fish in the right stage of the spawn for the odor to appear. Additionally, like me, not all people are capable of smelling it even when it is present. Don’t fret if that’s you. You’ll be able to find bream beds just fine using some of the other methods discussed above.
Cover Lots Of Water With A Bobber
Perhaps one of the best ways to locate bream beds, especially in murky water, is to just silently but quickly fish along the shoreline. Simply dip a bobber and cricket over and over and over until you strike gold. When you come upon a good spawning area, you’ll know it.
Late Summer Bream Fishing
As the spawn winds down in late summer, gills will school up and transition to deeper water where they can find cooler temps. They will often hold as deep as possible, yet where there’s still plenty of oxygen in the water. This depth varies by lake, so you’ll have to experiment or use a fish finder to locate where they are suspending. In late summer, start your search by probing the first deep breaks near spawning grounds, preferably those drop-offs near some type of cover.
It takes more effort to find post-spawn bluegills, but when you do there is a great chance you’ll have found them in numbers. Side imaging sonar can be your best friend when post-spawn fishing.
Fall Bluegill Fishing
Until the water temps drop into the 40’s you can usually find fall bluegill in relatively shallow water just as you did earlier in the year. However, by the time cold weather really starts to set in, you’ll need to dig deeper. Move out to the first significant depth change from where they were in early summer and begin your search there. You can sometimes catch them actively feeding in this “middle depth zone” as they prepare for their final move into a deeper winter pattern.
Winter Bluegill Fishing Spots
Winter fishing of any sort can be a bit of a challenge, and bream fishing is no exception. You’ll have to slow down your offerings and fish a bit deeper than the rest of the year. They will tend to be more concentrated, so finding them is more of a challenge. Once you find them, slow your presentation down to entice bites from lethargic fish. Look for wintering bluegill in trees in deep water or anywhere you can find a deeper “edge” of some sort.
Best Baits
Natural Baits
I wrote a whole article about the best baits for bluegill, linked *here*. It’s definitely worth checking out. To summarize, it’s hard to beat a lively cricket or worm. Other good options are grasshoppers, waxworms and meal worms. There are other baits that will work, as bluegill are known to not be picky eaters, but the ones listed above are the best.
Fake Baits
I personally steer away from fake baits when it comes to bream fishing. That’s of course just a personal preference. Typically fake options are going to underperform the real thing most of the time. This includes all those smelly fake baits such as Powerbait.
If you go searching, there are videos of individuals fishing real crickets, for example, side by side with smelly fake crickets. The catch ratio was drastically in favor of the real thing. With that said, you should do what you personally enjoy. No judgement here!
Best Line For Bluegill
I like 4 to 6 lb. clear monofilament, and rarely deviate from that for bream fishing. Although 2 lb. can work as well, I’m not too interesting in taking on that challenge. Anything larger than 6 lb. starts to become rather visible in the water.
As far as braid and fluorcarbon, I do love those for other types of fishing, but I don’t typically prefer them for sunfish. They both cost more, and are generally not as user friendly as monofilament. One exception is when fishing for large bluegill around heavy cover such as lily pads. In that case, braid can help you pull some fish free of the pads that you would otherwise lose.
Best Hooks For Bluegill
As with most fishing, hook size should match your bait, and baits for bluegill should, for the most part, be small. Size 6 hooks are just about ideal for bluegill fishing.
Thin wire hooks are best because the smaller wire allows natural baits to live longer. Thin wire hooks are also easier to remove from the fish’s mouth. Although they are more visible, and probably not preferred in clear water, long shank bream hooks will make hook removal easier.
With such small hooks, you’ll need to set the hook quickly with bream. There is no need to jerk the hook, just sweep your rod as soon as you get a bite. If you wait too long, the fish could suffer a mortal wound from swallowing the tiny hook.
3 Best Rigs For Bluegill
One of the best things about bream fishing is their eagerness to take a bait. Because of this, there are many effective rigs for bream. Below are my 3 favorite options.
1. Fishing With A Bobber For Bream
It’s really hard to beat the classic bobber setup. Nothing brings back childhood fishing memories quite like watching a bobber disappear. In fact this is still my preferred method for bluegill. I like to use a slip bobber, a tiny pinch on weight, and a thin wire #6 hook. I tip my hooks with either a cricket or a small piece of worm.
Fixed Position Bobbers
When using a bobber for bluegill, smaller is usually better, especially when they are spawning. Fixed position bobbers are fine when they are very shallow and there is little visible structure. If not, you might consider upgrading to a slip bobber. To use a fixed bobber setup, attach the float 1-3 feet above your hook and place a small split shot 6″ above your bait.
Slip Bobbers
A slip bobber allows more efficient casting when fishing deeper depths, and they allow you to get your bait into tighter areas without getting hung up as much.
Below is a video I made on how to tie a slip bobber setup. Although the video is geared toward crappie, the same concept applies to bream. Simply substitute the crappie jig for a split shot and a #6 hook, or use a smaller jig.
If you use a jig , a smaller 1/32 or 1/64 oz jig works better for bluegill. Make sure to size your bobber to match the weight of your jig. The float should sit vertically in the water.
2. Fishing Weightless Or Bottom Fishing
Another very effective technique is to ditch the bobber altogether. Spawning gills will often be found right along the bottom, and without a bobber you can just send your bait down there, no matter the exact depth they are holding.
Depending on your hook and bait, you may not even need a sinker. Just allow your bait to slowly make it’s way down, and slowly work it back to you. If you’re having issues with getting your bait to the bottom, you can add a small split shot.
When fishing without a bobber, a worm is a more efficient bait than crickets since worms typically cast farther than a cricket.
You’ll need a very lightweight rod and reel setup in order to cast such a small rig. I prefer ultralight setups around 6 feet long in order to cast these light payloads.
3. Drop Shot Rig For Bream
Drop shot rigs are another great bream fishing setup. They are especially effective when gills are in deep water and hanging near the bottom, but not necessarily right on the bottom.
While a slip bobber is also a good option in deep water, a drop shot gets you all the way to the bottom with no guess work. The weight sits on the bottom and the bait sits exactly how far up from the bottom that you choose. This is helpful since bluegill won’t always be relating directly to the very bottom.
Best Rod And Reel For Bream Fishing
Although there are many styles of fishing that can produce panfish, I’ll focus on what I view are the 2 most common. So, rather than hit on everything from ice fishing to fly fishing, we’ll discuss casting baits to them and swinging baits to them.
Casting For Bream

* Click image above to view prices on Amazon
For casting, I like a 5′ to 6.5′ Light or Ultra-Light rod paired up with a small spinning reel. Add to that some 4lb to 6lb clear monofilament and you’re in business. Something similar to the 5′ ultra light Ugly Stik GX2 Spinning Fishing Rod![]() shown above will do the job nicely.
shown above will do the job nicely.
You’ll want something like this capable of casting a very light payload. I’ll sometimes cast only a hook, a tiny piece of weight and a small worm. That takes a pretty light setup to cast effectively.
Swinging Baits For Bream

* Click image above to view prices on Amazon
For swinging out natural baits or jigs under a bobber or slip float, I prefer a long and sensitive jigging rod such as the B’n’M Ultralite 2 Piece Jiggin Pole![]() , pictured above. This rod is available in 10 to 12 foot lengths. A rod like this can double for bobber fishing or vertical jig fishing.
, pictured above. This rod is available in 10 to 12 foot lengths. A rod like this can double for bobber fishing or vertical jig fishing.
I personally prefer 10 and 11 foot jig poles for bluegill fishing. You can pair a rod like this with a simple $10-$20 crappie jigging reel, since all you’re really using the reel for is a line holder. If you want to step it up a bit, a tiny spinning reel makes for a nicer combo.
Other Essential Gear
Besides the gear needed to catch them, you’ll also need some way to remove hooks, and some way to keep your fish. I use needle-nosed fishing pliers or tiny forceps, aka hemostats, to remove hooks. A good stringer or cooler is a necessity as well, if you plan on keeping any fish.
How To Cook Sunfish
I like to filet big bluegills, coat them in Louisiana New Orleans Style Fish Fry, and fry them up in a pan of shallow oil. One trick that some people mess up when frying fish is not getting or keeping the oil hot enough. If you have to let the oil rest a minute between batches, do so until you can get the temps back up around 375F. This will ensure a nice crispy filet. Use a temp gauge to verify the oil is hot enough before dropping the next batch of filets in.
I also like to sometimes coat bream with blackened seasoning and pan fry them in olive oil to create a sort of psuedo-blackened style fish. To each his own. A nice big sunfish will pretty much cook up however you like.
Conclusion
There are many ways to catch bluegill, but in the end it’s hard to beat a cricket or a worm under a bobber. The real trick is locating them. During the spawn, keep moving until you find a nice concentration of beds. Once you stumble upon some good late spring bedding action, it’ll be on like a chicken bone. However, pre and post-spawn bream are a little bit different animal, but you can still find success if you follow the tips discussed above.
Good Luck!
Augustus Clay
If you enjoyed this article, you might like this one about how to catch redear sunfish.